The Olympus OM-1 is a legendary camera released in 1973, renowned for its compact design and durability․ Its instruction manual is essential for mastering its features and troubleshooting, serving as a comprehensive guide for photographers of all levels․
1․1 Overview of the Olympus OM-1 Camera
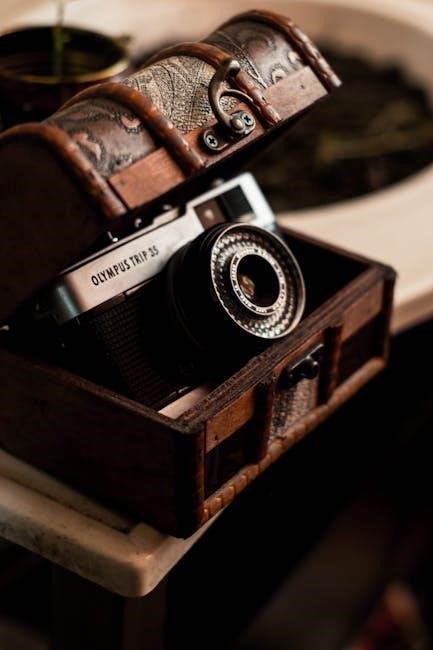
The Olympus OM-1, introduced in 1973, is a groundbreaking 35mm film SLR camera celebrated for its compact size, durability, and precision engineering․ Designed for professional photographers, it offers manual controls, interchangeable lenses, and a robust build, making it a favorite among photography enthusiasts․ Its intuitive design and advanced features for its time solidified its place in photography history․
1․2 Importance of the Instruction Manual
The Olympus OM-1 instruction manual is crucial for understanding the camera’s functionality, troubleshooting, and optimizing its use․ It provides detailed guidance on operating modes, maintenance, and safety precautions, ensuring photographers can fully utilize its features․ The manual also serves as a reference for resolving common issues and mastering advanced techniques, making it an indispensable resource for both novice and experienced users․
Key Features of the Olympus OM-1
The Olympus OM-1 features a compact, durable design with interchangeable lenses, manual controls, and a robust build, making it a favorite among professional and amateur photographers alike․
2․1 Camera Specifications
The Olympus OM-1 is a 35mm film SLR camera introduced in 1973․ It measures 136mm x 83mm x 50mm and weighs approximately 510g․ The camera features a horizontal cloth focal-plane shutter with speeds from 1 second to 1/1000th of a second, plus Bulb mode․ It supports interchangeable F․ Zuiko lenses and includes a fixed pentaprism viewfinder with 97% coverage, ensuring precise framing and control for photographers․
2․2 Unique Functions and Capabilities
The Olympus OM-1 boasts a range of innovative features, including a mirror lock-up mechanism to reduce camera shake and a self-timer for delayed shutter release․ It also offers aperture priority mode, allowing for precise control over depth of field, and a reliable manual mode for full exposure control․ These capabilities make the OM-1 versatile for various photography styles and lighting conditions․

Camera Controls and Components
The Olympus OM-1 features intuitive controls, including a mode dial, shutter button, and aperture ring․ Its viewfinder provides clear visibility, essential for precise composition and focus adjustments․
3․1 External Controls and Their Functions
The Olympus OM-1 features an intuitive layout of external controls․ The Shutter Speed Dial on top sets speeds from 1 to 1000th of a second and Bulb mode․ The Aperture Ring, located on the lens, adjusts f-stops․ The Film Advance Lever on the top right advances the film, while the Self-Timer and Mirror Lock-Up buttons near the lens minimize vibrations during exposure․ The Rewind Release on the bottom enables film rewinding․
3․2 Lens and Viewfinder Overview
The Olympus OM-1 supports interchangeable Zuiko lenses, offering versatility for various photography needs․ The viewfinder provides a clear, unobstructed view of the scene, with a built-in metering system for accurate exposure control․ Optional accessories like prism finders and magnifying eyepieces enhance usability, catering to professional and enthusiast photographers alike, ensuring precise composition and focus․

Loading Film and Battery
Open the camera back, align the film leader with the spool, and advance to the first frame․ Ensure the film is securely loaded for proper function․
Install the recommended battery type, following safety guidelines to avoid damage․ Proper installation ensures reliable camera operation and prevents electrical issues․
4․1 Step-by-Step Film Loading Process
- Open the camera back by releasing the latch on the right side․
- Insert the film spool into the spool chamber, ensuring it clicks into place․
- Align the film leader with the take-up spool, gently pulling to secure it․
- Close the camera back firmly and advance the film to the first frame․
Always check the frame counter to confirm the film is loaded correctly․
4;2 Battery Installation and Safety
Install the Olympus OM-1 battery safely by ensuring compatibility and proper handling․ Use the recommended battery type to avoid damage․ Insert batteries with terminals aligned correctly, securing the compartment tightly․ Avoid mixing old and new batteries or using damaged ones․ Handle batteries carefully to prevent leakage or corrosion․ Refer to the manual for specific guidelines and safety precautions to maintain optimal camera performance and longevity․

Shooting Modes and Settings
The Olympus OM-1 offers Aperture Priority and Manual modes, allowing precise control over exposure․ Adjustments are made via the aperture ring and shutter speed dial for optimal results․
5․1 Aperture Priority Mode
Aperture Priority Mode allows photographers to set the desired aperture, while the camera automatically adjusts the shutter speed for optimal exposure․ This mode is ideal for controlling depth of field, ensuring sharp focus, and creating artistic effects․ To activate it, set the mode dial to “A” and adjust the aperture using the lens ring․ The OM-1 ensures accurate exposure by calculating the appropriate shutter speed based on the selected aperture and lighting conditions․
5․2 Manual Mode and Exposure Control
Manual mode on the Olympus OM-1 offers full control over aperture and shutter speed․ Use the aperture ring and shutter speed dial to set desired exposures․ The built-in meter aids in precise adjustments․ Exposure compensation is achieved by adjusting the ASA dial or using external filters․ Bracketing shots and adjusting settings ensures optimal results in varying lighting conditions․ Mastering manual mode enhances creative control over your photography․

Maintenance and Troubleshooting
Regularly clean the lens and viewfinder with a soft cloth․ For troubleshooting, check the manual for solutions to common issues like jammed shutters or metering inaccuracies․
6․1 Cleaning and Care Tips
Regular maintenance ensures the Olympus OM-1 performs optimally․ Use a soft, dry cloth to wipe the exterior and remove dust․ Avoid harsh chemicals or abrasive materials․ For the viewfinder and lens, use a microfiber cloth and lens cleaning solution․ Store the camera in a cool, dry place away from direct sunlight․ Refer to the manual for detailed cleaning instructions to maintain your OM-1’s longevity and functionality․
6․2 Common Issues and Solutions
The Olympus OM-1 may experience issues like jammed film transport or mirror lock-up․ For film jams, gently check and clear obstructions․ For mirror lock-up, ensure the lever is fully disengaged․ Shutter curtains can attract dust; clean with a soft brush․ Battery drain occurs if the camera is unused; store batteries separately․ Always refer to the manual for detailed troubleshooting steps to maintain optimal performance․

Accessories for the Olympus OM-1
The Olympus OM-1 supports various accessories, including compatible lenses, flash units, and optional equipment, enhancing its functionality and versatility for photographers seeking advanced creative control․
7․1 Compatible Lenses and Flash Units
The Olympus OM-1 supports a wide range of Zuiko lenses, including the popular 50mm f/1․8․ Telephoto, wide-angle, and macro lenses are available, offering versatility for various photography needs․ Compatible flash units, such as the T32 and T20, provide reliable lighting solutions․ These accessories enhance the camera’s functionality, ensuring optimal performance in different shooting conditions․
7․2 Optional Accessories for Enhanced Use
The Olympus OM-1 can be enhanced with optional accessories like compatible lenses, flash units, and the Auto Bellows for macro photography․ Olympus Viewer 3 software aids in image management․ Remote shutters and grips improve usability, ensuring versatility for photographers seeking advanced creative control in various shooting scenarios․
Advanced Techniques and Tips
Explore advanced features like self-timer for reduced camera shake and mirror lock-up for sharper images․ Master metering modes and exposure compensation to enhance your photography skills effectively․
8․1 Using the Self-Timer and Mirror Lock-Up
The Olympus OM-1 features a self-timer with a 12-second delay, ideal for reducing camera shake in selfies or group shots․ The mirror lock-up function minimizes vibrations during exposure, ensuring sharper images․ Both functions are accessed via dedicated controls, allowing photographers to capture precise, blur-free photos with ease and confidence in various shooting scenarios․
8․2 Mastering Metering and Exposure
Metering and exposure are critical for capturing perfect shots with the Olympus OM-1․ The camera features a built-in center-weighted meter, providing accurate light readings․ For optimal results, adjust aperture and shutter speed manually or use aperture priority mode․ Bracketing shots and using external light meters can enhance precision․ Practice and experimentation will help you master these techniques and achieve consistent, professional-quality exposures․
Downloading and Referencing the Manual
The Olympus OM-1 instruction manual is available for download from official Olympus websites and third-party databases in PDF format, offering detailed guidance on camera features and troubleshooting․
9․1 Where to Find the Olympus OM-1 Manual
The Olympus OM-1 manual can be found on official Olympus websites, such as OM Digital Solutions, or through third-party archives like ManualsLib․ Additionally, enthusiast forums and photography communities often host downloadable PDF versions․ Ensure to verify the source for authenticity and check for language options, as manuals are available in multiple languages, including English and Japanese․
9․2 Navigating the Manual for Quick Reference
The Olympus OM-1 manual is structured for easy navigation, featuring clear sections and indexes․ Users can quickly locate specific functions or troubleshooting guides․ Digital versions often include bookmarks and search features, allowing photographers to access information efficiently․ For analog manuals, tabbed sections or detailed tables of contents aid in swift navigation, ensuring photographers can find what they need without delay․
The Olympus OM-1 instruction manual is your key to unlocking its full potential․ By following the guidelines, you can master its features, troubleshoot issues, and enhance your photography experience․ Happy shooting!
10․1 Final Tips for Getting the Most Out of Your OM-1
To maximize your Olympus OM-1 experience, explore its manual mode for full creative control․ Regularly clean the lens and viewfinder to ensure optimal performance․ Experiment with compatible lenses and accessories to expand your photography capabilities․ Refer to the instruction manual for troubleshooting common issues and mastering advanced techniques like metering and exposure․ Happy shooting!
10․2 Resources for Further Learning
For deeper understanding, explore the Olympus OM-1 instruction manual available online in PDF format․ Visit official Olympus websites or trusted photography forums for tutorials, troubleshooting guides, and user experiences․ YouTube channels and photography workshops also offer practical insights, helping you maximize the camera’s potential and refine your skills effectively․