Discover the art of creating natural, nourishing body butters using organic ingredients like shea butter, coconut oil, and essential oils. Perfect for all skin types, these recipes offer customizable fragrances and textures, ensuring soft, hydrated skin. With step-by-step guides and expert tips, you can craft homemade body butters that pamper and protect your skin, ideal for gifts or personal use. Explore the simplicity of making these luxurious treats at home with resources like the Body Butter Recipe PDF, featuring detailed instructions and a YouTube video tutorial for a whipped body butter recipe. This comprehensive guide provides everything you need to know to get started, from basic ingredients to advanced techniques, ensuring your homemade body butter is both effective and enjoyable.
What is Body Butter and Its Benefits
Body butter is a rich, luxurious moisturizer made from natural ingredients like shea butter, cocoa butter, and coconut oil. It deeply hydrates and nourishes the skin, offering long-lasting protection against dryness. Unlike lotions, body butters are thicker and more emollient, making them ideal for sensitive or dry skin. They also have anti-inflammatory properties, promoting skin health and elasticity. Many recipes are customizable, allowing you to add essential oils for fragrance or adjust textures for personal preference. This natural, non-greasy alternative is perfect for all skin types, including children and sensitive skin, providing softness and hydration.
Why Choose Homemade Body Butter Recipes
Homemade body butter recipes offer control over ingredients, ensuring natural and organic components without harsh chemicals. Customization allows you to tailor textures and fragrances to your preferences, making it suitable for all skin types. Additionally, homemade body butters are cost-effective and free from preservatives, providing a fresh and nourishing product. They also make thoughtful, personalized gifts. With simple steps and accessible ingredients, crafting your own body butter is a rewarding DIY project that ensures purity and effectiveness, offering soft, hydrated skin naturally.
Overview of Natural Ingredients Used
Natural ingredients like shea butter, cocoa butter, and coconut oil form the base of homemade body butters. These ingredients are rich in vitamins and antioxidants, providing deep moisturization and hydration. Shea butter, known for its healing properties, is often combined with jojoba or almond oil for enhanced moisturizing effects. Beeswax adds stability, while essential oils offer fragrance and additional skin benefits. These ingredients are chosen for their ability to nourish and protect the skin, ensuring a natural and effective product. Their combination creates a luxurious, long-lasting moisturizer for all skin types.
Basic Ingredients for Body Butter
Shea butter, cocoa butter, coconut oil, jojoba oil, and beeswax are essential components, providing hydration, nourishment, and stability to homemade body butters. These natural ingredients ensure a luxurious texture and long-lasting moisturization.
Shea Butter: Properties and Benefits
Shea butter is a rich, natural emollient renowned for its moisturizing and nourishing properties. It deeply hydrates the skin, reducing dryness and promoting elasticity. Packed with vitamins A and E, it protects against environmental damage and supports skin health. Shea butter is gentle enough for sensitive skin, including children’s, and is often used to soothe irritations. Its healing properties make it ideal for repairing dry patches and promoting soft, supple skin. Both yellow and ivory shea butter are effective, with color choice being a matter of personal preference.
Cocoa Butter and Coconut Oil: Their Roles
Cocoa butter and coconut oil are essential components in body butter recipes, offering distinct benefits. Cocoa butter, known for its rich, moisturizing properties, provides a pleasant aroma and deep hydration, making it ideal for dry skin. Coconut oil, with its lightweight and easily absorbed texture, enhances the blend’s hydrating effects. Together, they create a smooth, nourishing base that protects and softens the skin, leaving it feeling supple and refreshed. Their combination is vital for achieving the perfect consistency and moisturizing power in homemade body butters.
Jojoba Oil and Almond Oil: Moisturizing Agents
Jojoba and almond oils are key moisturizing agents in body butter recipes, offering lightweight hydration and skin-soothing benefits. Jojoba oil, with its lightweight texture, absorbs quickly, making it ideal for all skin types, while almond oil provides essential vitamins and antioxidants to nourish and protect the skin. Both oils complement shea and cocoa butter by enhancing hydration and skin softness. Their inclusion in body butter recipes ensures a balanced blend that promotes healthy, glowing skin and helps maintain its natural moisture barrier. These oils are perfect for creating a luxurious, non-greasy finish.
Tools and Equipment Needed
To make body butter, essential tools include a double boiler or saucepan for melting ingredients, a hand mixer or whisk for whipping, and storage containers for the final product.
Double Boiler or Saucepan Setup
A double boiler or a saucepan setup is essential for melting ingredients like shea butter and beeswax safely. Fill a saucepan with water, bring to a simmer, and place a heat-resistant bowl on top. Ensure the bowl doesn’t touch the water to avoid overheating. This method allows for gentle melting without burning. If you don’t have a double boiler, a saucepan with a bowl works perfectly. Monitor the heat closely to maintain a steady temperature, ensuring all ingredients melt evenly. This setup is crucial for achieving the right consistency in your body butter recipe.
Hand Mixer or Whisk for Whipping
A hand mixer or whisk is crucial for achieving the perfect whipped consistency in your body butter. After the mixture cools and solidifies slightly, use a hand mixer on medium speed to whip it until light and fluffy. If you prefer a denser texture, a whisk can be used for a gentler incorporation of air. Whipping incorporates air, making the body butter lighter and easier to apply. For best results, whip the mixture just before transferring it to storage containers, ensuring a smooth, luxurious finish perfect for all skin types. Consistency can be adjusted to your liking with more or less whipping.
Storage Containers for the Final Product
Choosing the right storage containers is essential for maintaining the freshness and texture of your homemade body butter. Opt for clean, airtight containers made of glass or tin to prevent contamination and exposure to air. These containers help preserve the natural ingredients and keep the body butter fresh for a longer period. Store them in a cool, dry place, such as a bathroom cabinet or pantry, to avoid melting or degradation. Using multiple small containers can also help portion the body butter for easier use. Refer to the Body Butter Recipe PDF for guidance on storage best practices.
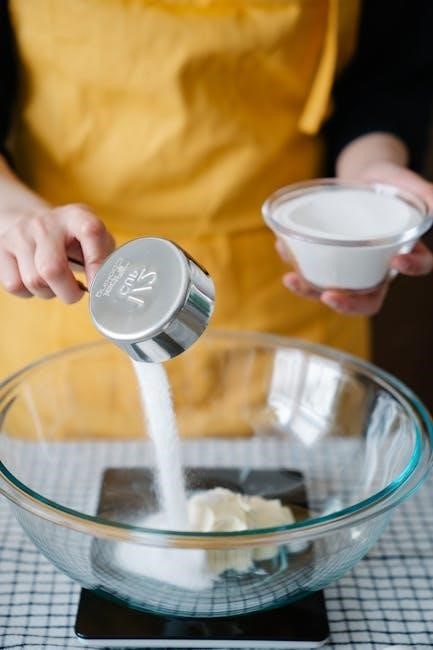
Step-by-Step Process for Making Body Butter
Melt shea butter and beeswax in a double boiler, mix with oils, cool until solid, whip until fluffy, and spoon into containers. For detailed guidance, refer to the Body Butter Recipe PDF.
Melting Shea Butter and Beeswax
Begin by melting shea butter and beeswax in a double boiler or stainless steel bowl over simmering water. Stir occasionally to ensure even melting. Once fully liquefied, remove from heat to proceed with mixing oils and butters. This step is crucial for achieving a smooth, consistent texture in your homemade body butter. For a detailed guide, refer to the Body Butter Recipe PDF, which includes a YouTube video tutorial for a whipped body butter recipe. Proper melting ensures all ingredients blend seamlessly, creating a luxurious final product.
Mixing Oils and Butters
After melting the shea butter and beeswax, gradually incorporate other oils like coconut, jojoba, or almond oil into the mixture. Stir thoroughly to ensure a smooth blend. This step combines the nourishing properties of butters and oils, creating a creamy base for your body butter. Essential oils can be added later for fragrance; Proper mixing ensures even distribution of ingredients, resulting in a luxurious, moisturizing product. For detailed instructions, refer to the Body Butter Recipe PDF, which includes a YouTube video tutorial for a whipped body butter recipe.
Cooling and Whippping the Mixture
Allow the melted mixture to cool slightly until it reaches a consistency similar to soft butter. This step is crucial for achieving the right texture. Once cooled, use a hand mixer or whisk to whip the mixture until it becomes light, fluffy, and doubled in volume. Be careful not to over-whip, as it may become too airy. For a smoother texture, whip in short intervals, checking the consistency. Proper cooling and whipping ensure a luxurious, spreadable body butter. Detailed steps are available in the Body Butter Recipe PDF, including tips for achieving the perfect consistency.
Customizing Your Body Butter
Personalize your body butter by adding essential oils for fragrance or adjusting consistency to suit different skin types. Customize with natural ingredients for unique benefits and preferences.
Adding Essential Oils for Fragrance
Elevate your body butter with essential oils for a personalized scent and therapeutic benefits. Lavender oil promotes relaxation, while peppermint invigorates the senses. Chamomile and rose geranium oils are ideal for sensitive skin. Use 1-2% of the total recipe amount to avoid irritation. Mix a few drops into the cooled mixture before whipping for an even distribution. Experiment with blends to create unique fragrances, ensuring each batch is tailored to your preferences or as a custom gift. Always patch test new oils to check for sensitivity.
Adjusting Consistency for Different Skin Types
Adjusting the consistency of your homemade body butter allows it to cater to different skin types effectively. For dry or sensitive skin, a thicker consistency with more shea or cocoa butter provides intense, long-lasting moisturization. For oily skin, a lighter blend with additional jojoba or almond oil ensures non-greasy hydration. Maintain a balanced ratio of butters to oils to achieve the desired texture. After mixing, refrigerate the blend for a few minutes to test the consistency, then whip it again if needed for a lighter or fluffier texture. This customization ensures your body butter is perfect for your skin type, enhancing its effectiveness and usability.
Storage and Shelf Life
Store homemade body butter in a cool, dry place to maintain freshness. When kept properly, it can last up to a year. Use airtight containers to prevent contamination and oxidation, ensuring the butter remains effective and fragrant. Always check for any changes in texture or smell before use.
Best Practices for Keeping Body Butter Fresh
To maintain the freshness of your homemade body butter, store it in a cool, dry place away from direct sunlight. Use an airtight container to prevent oxidation and contamination. Avoid introducing water or moisture, as this can lead to spoilage. If you live in a warm climate, consider refrigerating the body butter to prevent melting and separation. Before applying, always check for any unusual odors or textures. Properly stored body butter can last up to a year, ensuring it remains nourishing and effective for your skin.
Expected Shelf Life of Homemade Body Butter
Homemade body butter typically has a shelf life of 6 to 12 months when stored properly in a cool, dry environment. Factors like temperature, container type, and ingredient quality influence longevity. Refrigeration can extend shelf life, while high heat may cause separation or spoilage. Regularly inspect for off odors or mold, and discontinue use if any signs of spoilage appear. Properly crafted and stored body butter remains effective and safe for skin nourishment throughout its shelf life.