Overview of the Daikin Fit System
The Daikin Fit system is a compact, energy-efficient HVAC solution designed for space-limited installations. It offers quiet operation, seamless integration with existing ductwork, and advanced inverter technology for optimal performance.
1.1 Key Features and Benefits
The Daikin Fit system offers a compact design, ideal for space-limited installations, while delivering high efficiency and quiet operation. Its inverter technology ensures intelligent comfort control and energy savings. The system is 5 times quieter than traditional units and features a slim profile, making it perfect for homes with limited space. It also supports existing ductwork and line sets up to 100 feet, simplifying installation. These features provide a cost-effective, comfortable, and reliable HVAC solution for various residential applications.
1.2 System Design and Compactness
The Daikin Fit system is engineered with a sleek, compact design, making it ideal for space-constrained installations. Its slim profile allows for easy placement in tight areas, while its lightweight construction simplifies transportation and handling. The unit’s dimensions ensure minimal footprint, enabling installation in locations where traditional systems cannot fit. This compactness, combined with its efficient performance, makes the Daikin Fit system a practical solution for modern HVAC needs without compromising on power or comfort.
System Requirements and Compatibility
The Daikin Fit system is compatible with existing ductwork in single, two, and three-story homes. It requires minimal space for installation and works seamlessly with manufacturer-approved components.
2.1 Space and Structural Considerations
The Daikin Fit system is designed for space-efficient installation, making it ideal for homes with limited space. Its compact design allows for easy placement in tight areas, and it can connect up to 100 feet of piping for flexible installation. The unit’s lightweight and compact size enable it to be transported by a single worker or on a dolly, simplifying the installation process. Structural considerations include ensuring stable mounting surfaces and proper clearance for airflow and service access, as outlined in the installation manual.
2.2 Existing Ductwork Compatibility
The Daikin Fit system is designed to seamlessly integrate with existing ductwork, making it a practical choice for retrofits or upgrades. It is compatible with standard duct sizes and configurations, minimizing the need for extensive modifications. The system can utilize existing line sets and connect up to 100 feet of piping, ensuring a smooth transition during installation. This compatibility reduces installation complexity and saves time, while maintaining efficient performance and comfort in various home configurations.
Tools and Materials Needed
Essential tools include a tape measure, level, pipe cutter, brazing torch, and screwdrivers. Materials needed are refrigerant piping, insulation, and hardware for secure connections.
- Refrigerant piping
- Insulation materials
- Fasteners and connectors
3.1 Essential Tools for Installation
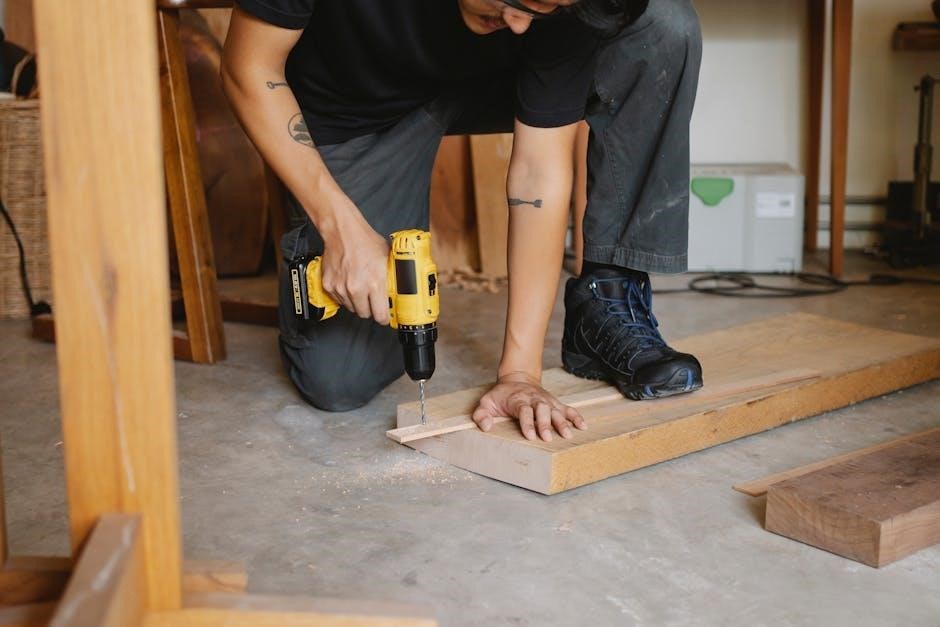
The installation of the Daikin Fit system requires specific tools to ensure accuracy and safety. A tape measure, level, and pipe cutter are essential for precise measurements and cuts. A brazing torch is necessary for connecting refrigerant lines, while screwdrivers and wrenches handle electrical and mechanical connections. Additional tools include a vacuum pump for evacuating the system and a manifold gauge for pressure testing. Proper tools ensure a professional and efficient installation process.
3.2 Required Materials and Supplies
For a successful Daikin Fit installation, essential materials include refrigerant piping, insulation, and drain hoses. Electrical wiring, connectors, and adapters are also necessary. Additionally, mounting brackets and fasteners are required for securing units. Ensure you have vacuum-rated sealants for leak prevention and air filters for improved air quality. All materials must meet manufacturer specifications to guarantee system performance and longevity. Proper supplies ensure a safe and efficient installation process.
Pre-Installation Steps
Ensure site readiness, verify system compatibility, and review installation plans. Confirm all tools and materials are available before proceeding with the Daikin Fit system setup.
4.1 Site Preparation
Ensure the installation site is ready by clearing the area and assembling all necessary tools and materials. Verify existing ductwork compatibility and ensure the space meets structural requirements. Check for manufacturer-approved system matches and ensure all components comply with local building codes. Secure the area to prevent accidents and ensure smooth access for equipment and personnel. Refer to the installation manual for specific preparation guidelines to avoid delays and ensure a successful setup.
- Gather all tools and materials.
- Verify ductwork compatibility.
- Ensure system approval.
- Secure the installation area.
4.2 System Matching and Approval
Ensure the Daikin Fit system components are properly matched and approved by the manufacturer. Verify compatibility between indoor and outdoor units, and confirm compliance with local regulations. Follow Daikin’s guidelines for system pairing to maintain efficiency and performance. Non-compliant systems may lead to reduced functionality or safety hazards. Always refer to the installation manual for specific matching criteria and approval processes.
- Verify indoor-outdoor unit compatibility.
- Confirm manufacturer approval.
- Comply with local regulations.

Safety Precautions and Guidelines
Adhere to all safety instructions to prevent hazards. Ensure proper training and use of approved equipment. Follow guidelines to maintain safety and system integrity during installation.
5.1 Safety Symbols and Labels
Understand and follow all safety symbols and labels in the Daikin Fit installation manual. These indicators highlight potential hazards, ensuring safe handling and installation. Properly trained individuals must recognize and adhere to these symbols to avoid risks. The manual emphasizes the importance of safety precautions, such as proper equipment usage and adherence to guidelines, to prevent accidents and maintain system integrity during the installation process.
5.2 Installer Responsibilities
Installers must ensure the Daikin Fit system is installed correctly, adhering to the manual’s instructions and safety guidelines. They are responsible for using proper tools, materials, and techniques to avoid system damage or safety risks. Installers must comply with local regulations and manufacturer specifications, ensuring all components are properly matched and approved. They should also verify that all safety precautions are followed and that the system operates efficiently post-installation. Proper training and adherence to the manual are essential for a successful installation.

Installation Process
The Daikin Fit installation involves mounting indoor and outdoor units, connecting refrigerant piping, and establishing electrical connections. Ensure all steps follow the manual’s guidelines for proper setup and efficiency.
6.1 Indoor Unit Installation
Begin by preparing the site for the indoor unit, ensuring a stable and level surface. Mount the unit securely, following the manual’s guidelines. Connect the refrigerant lines and electrical connections carefully. Ensure proper drainage and ventilation. Double-check all fasteners and connections for tightness. Finally, perform a safety inspection to confirm the unit is installed correctly and safely before proceeding to the next steps.
6.2 Outdoor Unit Installation
Position the outdoor unit on a level surface, ensuring proper drainage and airflow. Secure the unit firmly to prevent vibration. Connect the refrigerant piping, ensuring brazed connections are leak-free. Follow the manufacturer’s guidelines for electrical connections and grounding. Maintain clearance from surrounding structures for optimal performance. Inspect all connections for tightness and integrity. Ensure compliance with local building codes and safety standards during installation.
6.3 Electrical Connections
Connect the electrical supply to the Daikin Fit system according to the installation manual. Ensure the wiring matches the specified voltage and amperage ratings. Secure all connections tightly to avoid loose contacts. Use appropriately sized wires to prevent overheating. Verify the circuit is grounded properly for safety. Turn off the power supply before making any connections. Double-check all wiring for compliance with local electrical codes and manufacturer guidelines to ensure safe and efficient operation.
6.4 Refrigerant Piping and Brazing
Ensure proper brazing of refrigerant piping to maintain system efficiency and prevent leaks. Use approved materials and techniques to secure connections. The Daikin Fit system allows up to 100 feet of piping for flexible installations. After brazing, inspect joints for integrity and cleanliness. Follow manufacturer guidelines to ensure optimal refrigerant flow and system performance, adhering to safety standards and installation best practices for a reliable setup.

Commissioning and Startup
Commissioning involves initial system startup, leak checks, and performance verification. Ensure all settings are correct and the system operates smoothly, adhering to the installation manual’s guidelines.
7.1 Initial System Checkout
The initial system checkout ensures all components are properly connected and functioning. Begin by verifying the power supply, checking for any visible damage or leaks, and ensuring the thermostat is set correctly. Perform a trial operation to test heating, cooling, and fan modes. Use the remote controller to confirm smooth operation and verify airflow through vents. Ensure all safety features and alarms are operational. Refer to the installation manual for specific startup procedures and safety guidelines to avoid potential issues during commissioning.
7.2 Testing and Balancing
After initial startup, perform thorough testing to ensure the system operates efficiently. Check airflow balance across all vents, adjusting dampers as needed for even distribution. Verify temperature and humidity levels meet desired settings. Test all operating modes, including heating, cooling, and fan-only functions. Ensure the inverter technology is functioning correctly for optimal performance. Refer to the installation manual for specific balancing procedures to achieve maximum efficiency and comfort. This step ensures the system meets the designed specifications and user expectations.

Troubleshooting Common Issues
Common issues include error codes, improper cooling/heating, or noise. Check connections, sensors, and filters. Refer to the manual for specific error code solutions and repairs.
8.1 Common Installation Mistakes
Common installation mistakes include improper brazing techniques, incorrect piping connections, and ignoring system matching requirements. Ensure all connections are secure and meet manufacturer specifications. Incorrect refrigerant charging or line set sizing can lead to reduced efficiency or system failure. Always follow the installation manual’s guidelines to avoid these issues and ensure optimal system performance. Proper training and adherence to safety protocols are essential to prevent errors during the installation process.
8.2 Error Codes and Solutions
Common error codes for the Daikin Fit system include E1 (sensor malfunction), E2 (refrigerant leak), and E3 (communication issues). Solutions involve checking sensor connections, inspecting for refrigerant leaks, and ensuring proper communication wiring. Refer to the installation manual for specific troubleshooting steps. Addressing these issues promptly ensures system efficiency and longevity. Always follow manufacturer guidelines to resolve errors effectively and maintain optimal performance.

Maintenance and Service
Regular maintenance ensures optimal performance. Clean filters, inspect refrigerant lines, and check system components annually. Schedule professional service to address wear and tear promptly.
9.1 Routine Maintenance Tasks
Regular maintenance is crucial for optimal performance. Clean or replace air filters monthly to ensure proper airflow and efficiency. Inspect refrigerant lines for leaks and damage, and check drain pipes for blockages. Schedule annual professional servicing to inspect and clean internal components, ensuring the system operates efficiently. Additionally, verify thermostat settings and inspect electrical connections for wear or damage. Proper maintenance prevents issues and extends the system’s lifespan.
9.2 Service and Repair Guidelines
For service and repairs, always follow the manufacturer’s guidelines in the Daikin Fit installation manual. Use only approved spare parts to maintain system performance. Licensed technicians should perform diagnostics and repairs to ensure safety and compliance. Regularly inspect electrical connections, refrigerant lines, and internal components for damage or leaks. Address issues promptly to prevent further damage. Use specialized tools for accurate diagnostics and repairs. Always ensure proper system shutdown before servicing to avoid injuries or equipment damage.
Warranty and Support
The Daikin Fit system comes with a comprehensive warranty, offering coverage for parts and labor. Customers can access support through product registration and online resources. Visit DaikinComfort.com for detailed warranty information and terms.
10.1 Warranty Overview
The Daikin Fit system is backed by a comprehensive warranty program, offering coverage for parts and labor. The standard warranty typically includes a 10-year limited warranty on parts and compressors, subject to proper installation and registration. Extended warranties may also be available through authorized dealers. Customers can register their products and access warranty details on the Daikin Comfort website, ensuring peace of mind and protection for their investment.
10.2 Customer Support Resources
Daikin provides extensive customer support resources to ensure a seamless experience with the Fit system. These include access to installation manuals, product brochures, and warranty information through their website. Additionally, Daikin offers a dedicated support center with training materials and software tools. Customers can also subscribe to email newsletters for updates and discounts, while a toll-free helpline and online portal are available for direct assistance, ensuring quick resolution of any issues or inquiries.